Gap Filler Won’t Cure Properly? Here’s the Diagnostic Checklist
The material went in, you ran the cure cycle, and what came out is still tacky, soft, or fully uncured. Before assuming the product is bad, work through this checklist — in most cases, one of four things went wrong.
Most Cure Failures Are Equipment or Process Issues — Not Material Defects
The four failure modes below account for the vast majority of gap filler cure failures in production. Work through them in order before concluding the material is out of spec.
Understanding the Cure Mechanism First
Knowing which cure type you are running is critical — because the failure modes are completely different for each system.
2-Part Addition Cure
Platinum-catalyzed crosslinking reaction. Cure begins when Part A (platinum catalyst) contacts Part B (crosslinker). Proceeds at room temperature, significantly accelerated at 70–100°C. Most common format in production gap fillers
1-Part Post-Cure
Reaction starts at room temperature and is accelerated by heat. Single-component — no mixing required. Cure failure modes focus on temperature, time, and catalyst inhibition
1-Part Pre-Cured
No in-situ cure — material arrives ready to use. If you are running this grade and seeing softness or tack, the issue is storage or handling — not a cure process failure
The checklist below is written for 2-part addition-cure systems — the most common format and the one with the most possible failure modes. If you are running a 1-part system, Check 3 (catalyst inhibition) and Check 4 (temperature/time) still apply; Checks 1 and 2 do not.
4-Check Diagnostic for Gap Filler Cure Failure
Run through these four checks in order — the sequence is deliberate. Equipment issues (Checks 1–2) are the most common cause and should be ruled out before suspecting material quality (Checks 3–4).
Check 1 — Actual Mix Ratio at the Output
The 1:1 ratio printed on the TDS is the target — but what your equipment is actually dispensing may be significantly different. A worn valve, off-spec pump timing, or a partial blockage in one side of the dispenser can produce severely off-ratio output that will not cure.
How to verify: Weigh the A and B component outputs separately over 10 dispense cycles. The ratio should be within ±5% of target. If it falls outside that window, correct the equipment before diagnosing the material. Off-ratio material will not cure regardless of temperature or time.
Check 2 — Static Mixer Performance
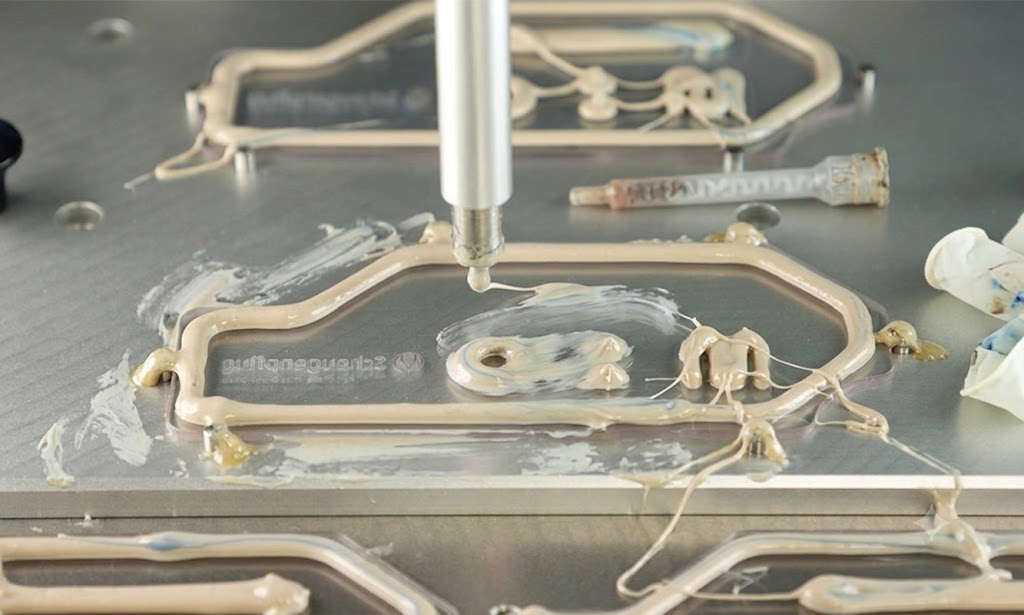
A worn or partially blocked static mixer produces incompletely mixed material — even at the correct A:B ratio. Incomplete mixing produces the same symptom as off-ratio dispensing: soft, tacky, or uncured bondline.
Visual Tell: Streaking
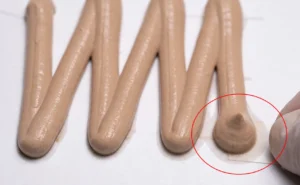
Streaking or color non-uniformity in the dispensed bead indicates incomplete mixing — particularly visible when Part A and Part B are different colors (e.g., blue and pale blue formulations)
Replace on Schedule — Not on Failure
Replace the static mixer at the manufacturer’s recommended interval. By the time you see dispensing issues from a worn mixer, you have already applied bad material to parts
Check 3 — Catalyst Inhibition from Contamination
Platinum-catalyzed silicones are sensitive to certain contaminants that can deactivate or inhibit the catalyst — preventing cure entirely, or producing a tacky surface that never fully crosslinks regardless of bake time.
Common culprits in electronics manufacturing:
Sulfur Compounds
Rubber gloves, certain adhesives, and mold release agents — sulfur is the most common catalyst poison in assembly environments
Tin Compounds
Some RTV silicones or tin-catalyzed materials used on the same line — cross-contamination between material types is frequently overlooked
Nitrogen & Phosphorus Compounds
Certain fluxes used in soldering — particularly relevant when gap filler is applied after SMT reflow on a shared line
Amine-Containing Materials
Some epoxy hardeners, cleaning agents, and primers — amine contamination of the substrate is a known platinum catalyst inhibitor
How to identify contamination as the cause: Run a test cure on a clean aluminum or glass coupon using the same material and cure schedule. If the test coupon cures properly while production parts do not, the substrate is the source of inhibition — not the material or equipment.
Check 4 — Cure Temperature and Time Profile
Review your oven profile against the TDS cure specification. The most frequently missed issue here is the difference between oven air temperature and actual part temperature.
Thermal Mass Effect
Thick bondlines or large metal substrates acting as heat sinks may not reach target cure temperature within your standard dwell time — even if the oven air is at spec
Verify with a Thermocouple on the Part
Always verify cure temperature with a thermocouple placed on the actual substrate or bondline — not the oven air temperature sensor. These can differ by 10–30°C in practice
Recovery Procedure for Partially Cured Material
If you have material that is soft but shows some crosslinking — not fully liquid — a post-bake may drive the reaction further toward full cure. This also serves as a diagnostic step to distinguish between temperature/time failures and mixing/contamination failures.
The post-bake response tells you the root cause: material that builds hardness under additional heat had a temperature or time problem. Material that stays soft regardless of bake time has a mixing ratio, mixer, or catalyst inhibition problem — and these parts should be scrapped and reworked.
Diagnosis in Order — Quick Reference
| Check | What to Verify | Symptom If Failed | Corrective Action |
|---|---|---|---|
| 1 | Actual A:B ratio at output — weigh separately over 10 cycles | Uncured or soft material — uniform across batch | Repair dispenser; recalibrate pump timing |
| 2 | Static mixer condition — inspect for wear, blockage, or streaking | Soft material with visible streaking in bead | Replace mixer on schedule, not on failure |
| 3 | Catalyst inhibition — test cure on clean aluminum coupon | Tacky surface correlated with specific substrates | Identify and eliminate contamination source |
| 4 | Actual part temperature — thermocouple on substrate, not oven air | Soft material, consistent across all substrates | Extend dwell time or increase oven setpoint |
Bottom Line
Verify mix ratio mechanically. Inspect the static mixer. Rule out catalyst inhibition from substrate or environment. Then check your thermal profile. Most gap filler cure failures trace to one of these four — in that order of likelihood.
Frequently Asked Questions
The four most common causes are: (1) incorrect A:B mix ratio at the dispenser output — verify by weighing A and B separately over 10 cycles, target ±5% of spec; (2) worn or blocked static mixer producing incompletely mixed material; (3) catalyst inhibition from contaminants on the substrate such as sulfur compounds, tin compounds, amines, or certain fluxes; (4) insufficient cure temperature or time — verify with a thermocouple on the actual part, not oven air temperature.
Platinum-catalyzed silicones are sensitive to: sulfur compounds (rubber gloves, certain adhesives, mold release agents); tin compounds (from RTV silicones or tin-catalyzed materials used on the same line); nitrogen and phosphorus compounds (certain soldering fluxes); and amine-containing materials (some epoxy hardeners, primers, or cleaning agents). The diagnostic tell: tacky or soft material on production substrates while a test coupon on clean aluminum cures normally — the substrate is the contamination source.
Run a post-bake at 100–120°C for 30–60 minutes on the soft material. If hardness builds during the extended bake → insufficient cure temperature or time is the cause. If the material stays soft regardless of additional bake → off-ratio mix or catalyst inhibition. Cross-check by curing fresh material on a clean aluminum coupon — if the coupon cures fine, substrate contamination is the cause of production failures.
Dispense Parts A and B separately into separate containers over 10 dispense cycles, then weigh each. The ratio should be within ±5% of the target (typically 1:1 by weight). If outside this window, the dispenser needs service — check valve wear, pump timing, and for partial blockages on either side of the dispenser head before running production material.
If the material shows some crosslinking (not fully liquid), a post-bake at 100–120°C for 30–60 minutes may drive the reaction toward full cure — this works when the root cause is insufficient cure time or temperature. It will not work if the cause is an off-ratio mix or catalyst inhibition. In those cases, additional heat will not improve the material and affected parts should be scrapped and reworked.
Oven air temperature and actual bondline temperature can differ by 10–30°C in practice. Large metal substrates acting as heat sinks and thick bondlines may not reach target cure temperature within standard dwell time — even when the oven air is at spec. Always verify with a thermocouple placed directly on the substrate or near the bondline, not on the oven wall or by relying on the oven’s built-in sensor.